Sunday, November 22, 2015

Mini Five Cucumber

This is the second variety of small cucumbers that I'm growing. The first one was Spacemaster Cucumber, which I have posted before, here


The Mini Five Cucumber seed germinated on the 3rd day of sowing the seeds.
. Above seedling is three weeks old with true leaves, transplanted to a 12'" pot.


Slightly more than five week old seedling, it grows quite quickly. Prepare the stakes for support when the seedling is still small. I did not prepare enough stakes and have to further placed new stakes and do up the trellis when the plant is growing. Try to avoid that as it may disturb the growing roots. 


During the growing period, watch out for cucumber beetles and squash bugs. (I have a squash plant next to the cucumber, but that will be a post for another day). They love squash and cucumber plants. I got rid of them by spraying neem oil spray solution. The solution would not kill them immediately, but it will leave them weaken and most of the time, they would not fly off immediately, so it will be easier to catch them when they are weaken. If they are left on the plant, they will feed on the leaves, make the plant weaker and eventually the plant will die. Also keep a look out for small tiny yellow eggs under the leaves. Get rid of them by spraying with organic spray.

I feed the plant with organic fertilizer which has a higher content of phosphorous and potassium for root growth and flower development. I also use a non-toxic fertilizer spray to encourage flowering and fruiting, as soon as the plant starts to flower, about once in every 10 days.

Most importantly, do not allow the plant to dry out. Growing them in pots, the soil will dry out quite fast in our hot humid blazing weather. I water the plant at least twice a day, sometimes three or four times, depending on the day's heat. The cucumber plant is rather fragile and the leaves would be wilting and sleeping on hot afternoons if exposed under the intense heat for many hours. So on most afternoons, I move the pot under shade (yes, tedious work, but worth it!). On one afternoon, I left the plant under the hot sun as I was not around that afternoon. When I came back, to my horror, found the plant with the leaves all "sleeping". Some of the leaves are already damaged by the hot scorching heat. I watered the plant immediately, watered again a few more times after that, and when the plant has "awaken", I cut off the dead leaves a few days later, already brittle by then. Took extra care of it since then, and now it seems to be doing OK.

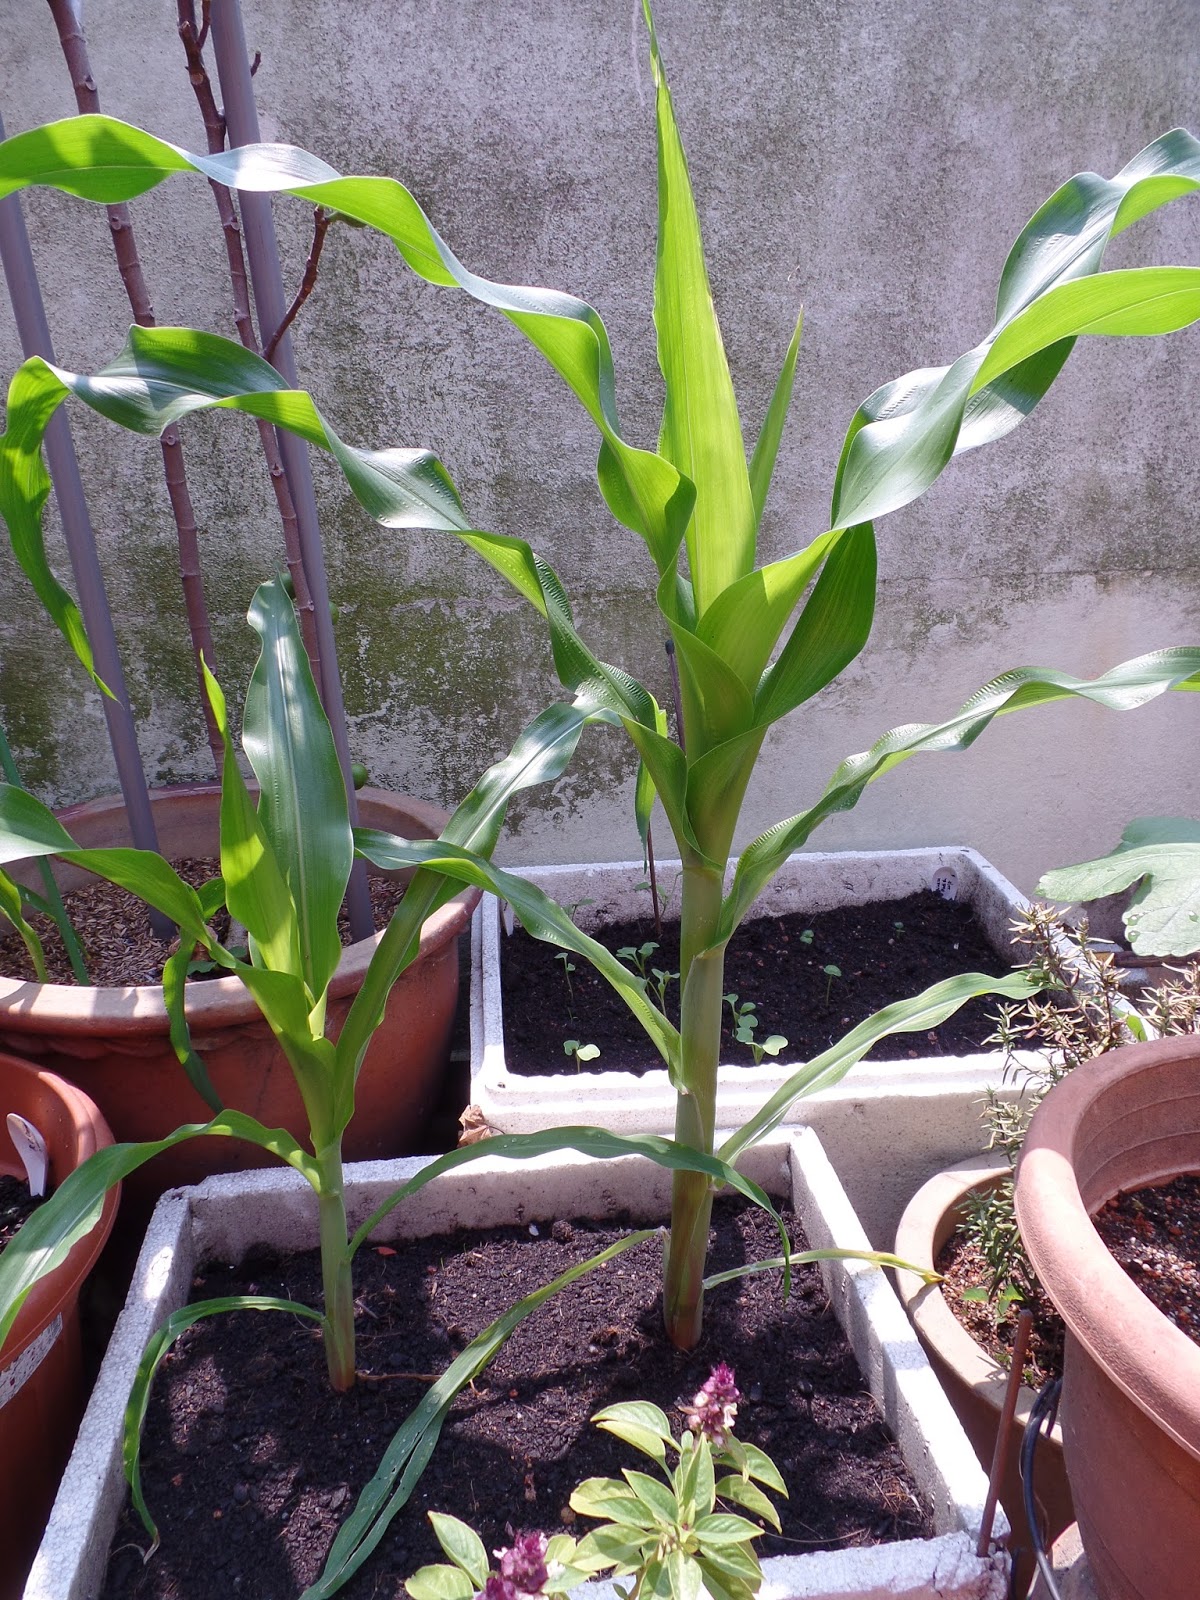
Even though cucumber plants love the sun, our weather has been really hot lately, and it was just too much for it. Unlike bitter gourd plants which are more hardy and can withstand hot weather much better, the cucumber plant is more fragile to hot conditions. Best grow them in areas where they can get a few hours of morning sun, and shaded for the rest of the day. This is what I observed from my experience, and it might be different in the area where you live, depending on the temperature and climate.


The first plant :  At two months from date of sowing the seeds.

This Mini Five Cucumber plant is a fast grower. Make a simple trellis with some bamboo stakes so that the tendrils of the plants have something to cling to for support. And you may need to help the plant along by steering the stems and tendrils along the support as the plant grows. 


The plant starts to produce flowers at about 6 weeks old. Initially, only the male flowers appear, dozens of flowers! Male flower is attached to the stem at the base of the flower.


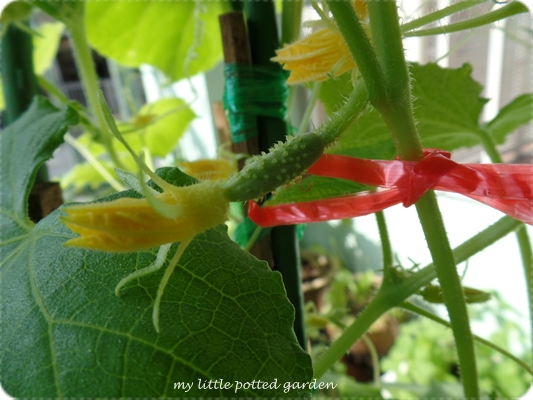
About a week later, the female flowers appear. Female flowers can be distinguished by the little cucumber attached to the flower. It needs the pollen from the male flower for pollination to occur so that the cucumbers can be fully formed. Otherwise the flowers will wilt and the small immature cucumber will simply turned yellow and eventually dried off.  In my potted garden, there are some ants around, but not enough of bees to do the pollination job nature's way, so I have to do it manually by hand pollination, in order to get as many cucumbers as I can!

Lately, the flowers are not blooming as they should. There are dozens of female buds, both male and female, but for some reason or other, they do not go to full bloom. Could it be the reason being the weather is just too hot? Where I placed the pot at my front porch, it receives full direct sun, maybe it is just too hot, and it is stressful for the plant? On the other hand, my second plant, which I placed at my back yard is enjoying the sun in the morning for about 2-3 hours or so, and is shaded the rest of the day. This plant is doing much better, it is half the size of the first plant and the flowers are blooming so nicely, which makes pollinating work so much easier. For the first plant, I have to gently tear open the petals of the unopened female flower (making sure that it is mature enough to be pollinated before doing that) to expose the stigma, and I plucked one full bloomed male flower from my second plant, gently remove all the petals, and rub the stamen (where the pollen produces) gently onto the stigma of the female flower. The flowers are very fragile, so handle them gently. I should be getting more cucumbers from the first plant if not for these reasons. Some of the pollinations done are not successful. But I'm expecting more cucumbers from my second plant, which appears to be doing fine.


These two pictures are spaced only by a difference of three days.  The first picture shows the cucumber is forming along very nicely, about 4-5 days after pollination. Once the pollination occurs successfully, the cucumber will start to form it's fruit and it grows quite fast after that. Makes me happy each day looking at the cucumbers! The second picture was taken on harvest day, about 7 days from date of pollination.


The second cucumber. This was harvested a day later than the one above.


Mini Five Cucumbers are mini cucumbers, as the name implies. They can be harvested when they have grown to about 4" to 5" in length or even smaller if preferred. These two cucumbers were harvested at about 8-1/2 weeks from date of sowing the seeds. Sizes for these two, one is about 4-1/2" and the other almost 5".


There's not much seeds insides which makes them really great for eating raw. These mini cucumbers are juicy, crisp and succulent! You don't have to peel them. Growing your own without the use of any pesticides, you will be happy to serve your family such healthy fresh produce from your own garden.


Cucumber, Onion and Mint Salad. 

The second Mini Five Cucumber plant of which I've sowed the seeds about 10 days later than the plant above, is blooming with lots of both male and female flowers right now. I have pollinated a few flowers the last two days (five to be exact), and looking forward to more mini cucumber harvest in the next week or so, hopefully!  Planning to grow more of these Mini Five Cucumber plants, I really like this variety, the cucumbers are excellent for eating raw.

If you have not tried growing Mini Five Cucumbers before, you should give it a go! They do not need much space, great for growing in pots and containers. What you will need is a medium to large pot, some stakes for support and your TLC! When you harvest your first cucumbers, you would be smiling, like I did! Now that I have tried growing two varieties of mini cucumbers, I'm looking into growing the bigger ones.


In case you are wondering where I got the seeds from,  I bought these Mini Five Cucumber Seeds from :
My Lestary Seeds


Happy Gardening !


Sunday, November 15, 2015

Thai Basil

I started with one pot of basil from the nursery many, many years ago, and have not bought anymore Thai Basil plants since then. When the plant starts to flower and producing seeds, little seedlings will sprout in some of the pots in my potted garden (thanks to the wind and probably some bees that transports the seeds everywhere!). Sometimes I have to discard the little seedlings, keeping two or three of the healthiest looking ones, as there were simply too many! They are easy to grow and very aromatic. In order for the plant to grow more leaves, trim the flowers as soon as they start to appear. By cutting off the flowers, the plant would concentrate on growing more stems and leaves.


 This plant started off from a little seedling I found growing in one of my veggie pots. I replanted the seedling to this container and it is growing really well. 


The flower buds are already forming at the tips of the stems. If you want more leaves for your cooking pots, trim off those flowers. This will encourage new growth of stems and leaves. How to trim off the flowers? Cut the stem, below the second or third set of leaves under the flower buds. To collect some seeds, allow a stem or two with flower buds to grow to full maturity. When the flowers have bloomed and dried off, the seeds are ready to be collected.


 I have harvested the leaves a few times already, and the plant is sending out more stems and leaves. It is getting bushier, which is what I want!


Happy Gardening !


Friday, October 30, 2015

Sweet Baby Corn : Zea Mays

I bought a pack of sweet baby corn seeds, a variety that specially produce baby corns that are usually used in stir-fries and for salads.

I sowed 6 seeds and all germinated. The seedlings grew at a rather fast rate. This is the first time I'm growing baby corns, so I'm pretty ignorant about its growing habits and such. They were growing really well and when the tassels grew, I was so excited! It was a pretty sight! Then, when the baby corns starts to appear, that was when I get pretty confused! Read on to find out why.


5 weeks old, they grew pretty fast!


The tassel growing at the top, at six weeks.


Tassel getting bigger separating into individual long "stems"


At seven weeks, the tassel (the male flowers) has grown into dangling anthers. And the plant stands at more than 5 feet tall. This is the tallest among the 6 plants, the rest are in various heights. Since this is a baby sweet corn variety, the tassels are not important in pollinating the silks of the corn, as the baby corn will be harvested at the baby stage. But I did shake the plant gently, and I can actually see the golden pollen falling off like fine gold dust! I tried taking the photos but the camera could not capture the golden dust! Too bad, so you will just have to imagine that yourself! :)


Spotted the first ears of corn at seven weeks.


.a week later


At about two weeks later, the cob is visible with the silks but without the husks covering it! See the last pic on the right, the husks are opened exposing the corn inside. Is this normal? The cobs are green in colour though from the photo above the cobs looks yellow, but it is green, only the tip is light creamy yellow in colour. Should I wait until the cob baby kernels turn yellow? I am baffled and confused! A freak corn? I google for information from the internet and could not find anything on this. All of the pictures I've seen are corn with the husks on when harvested. So I decided to wait a little longer.


A few days later I decided to harvest it at this point, as it is getting hard and tough, and not turning yellow! Obviously it is beyond the harvesting time!


See the green cobs? Another one! There are about 4 or 5 of these growing, which was pretty disappointing! Anyone knows why they grow without the husks covering them? My only guess is that the ears are already growing inside, hidden by the leaf of the corn plant, and by the time they actually emerge from the leaf node of the plant, they have already matured and past the stage of harvesting. But why was it not enclosed in the husks. Strange! Even the silks are not turning brown or red. Does anyone know why? 


Fortunately, there are a few good ones! There, this looks more like what a baby corn should be! They are best harvested at this stage, about 4" to 6" long, and when the silks are beginning to grow.


Overall, from the six plants, the harvest are pretty disappointing, due to those corns that grew without the husks which turned out hard and tough. I managed to get about 10 good ones. There are a few which I harvested maybe a little too late, as I was unsure of the right time to harvest, but they were OK to eat, still tender but not as sweet as the ones I harvested much smaller in size. They are cream coloured instead of yellow, which we usually buy from the market. I ate one small corn raw, right after harvesting and they are very tender and sweet! So I ate another one! Very sweet! The rest goes into a dish of stir-fries with broccoli and carrots. 


Would I grow these Sweet Baby Corns again? At the moment no, but I would, if only I have the extra space and preferably to grow them in the ground or if using pots, make sure the pot is really, really deep. I grew them in large styrofoam containers and the roots grew out of the holes at the bottom and are all over the floor (see the photo below).


See the outline shapes of the two bricks I placed under another container which was placed next to it. The roots found their way under the bricks and they are really compact, I could pull them out and the whole piece looks like a piece of thick carpet! They have a very big root system. At the end of the growing period, the tallest corn plant stands at 7 feet high, which is not what I expected, as I thought that growing them in containers would somehow be a little shorter than that.  


How I grow the sweet baby corn in my potted garden :
I direct seeded them in the containers. Soil medium I used was a mixture of organic veggie gardening soil, added some organic compost and fertilized with organic humus fertilizer which is rich in nitrogen, as I've read that corn plants are heavy feeders of nitrogen.  I fed them with more fertilizer during their growing period, about once in two to three weeks. Corn plants need frequent watering, do not allow the soil to dry out. Our weather is extremely  hot, so I water them twice a day. Corn plants needs full sun to grow, so best position them in the area where they can receive full sun as much as possible. With enough of moisture and fertilizer, they grow very fast.

Each corn plant can yield about 3 to 5 baby corns. So in order to enjoy more baby corns, you would need to grow at least about 10 plants. I harvested the first baby corn at about 65 to 70 days (as what the packet indicates) from date of sowing the seeds. 

It has been a learning experience growing baby corn, watching the progress from the seed to seedling, see how fast they grew, excited at the sight of the first tassel (and beautiful golden dusts!), waiting for the ears of corn to form, and the sweet harvest in the end, even though I was expecting more. I'm glad that I did give a go at growing sweet baby corns! Have you grown corn plants before?


Happy Gardening !


Friday, September 11, 2015

What's growing in my potted garden

Here are some of the veggies which I'm growing right now in my garden pots and containers :


Cilantro, my favourite, I have two containers of these fragrant herb.


Dwarf Nai Pak


Sweet Baby Corn


White Icicle Radish


Daikon (Chinese Radish), sharing the same container with the White Icicle


Clemson Spineless Green Okra, just beginning to flower.


French Breakfast Radish...only one seed germinated, out the 6 seeds I sowed. I transplanted the little seedling in the same pot with the Okra, and it is growing really well, the Okra too. These two seems to be very good companions.


Cabbage


Broccoli, it is taking forever for the broccoli head to appear. So far nothing yet, and it has been about 9 to 10 months! Will it ever grow the head?


Raab Rapini Broccoli.  Despite its name, it is actually the same family of turnips. It will grow many small florets with long stems. First time I'm growing these and is curious whether it can grow in our hot weather. So far the plants look healthy, but I have not seen any florets yet.


Pomegranate, local variety. There are 5 fruits growing right now, and a few flowers have dropped off after a heavy rain.


Will update on the progress of these plants!! 


Happy Gardening !

Friday, August 21, 2015

Ridged Luffa Gourd (Petola)

I'm sharing today, my experiences in growing Ridged Luffa Gourd, known as Petola (in Malay). This common veggie can be found in the market whole year round. A popular veggie that is great in stir-fries, soups and the skin can be mashed and cooked in a sambal dish, as I was told by an Indian friend.


 This is the female flower. It is distinguished from the male flower by the little gourd that is attached to the flower.


 These are the male flowers, which grow in clusters. Unlike the flowers of the bitter gourds which bloom in the morning, these luffa flowers, both the female and male flowers, bloom in the evening. 


I pollinated the above female gourd manually, and it has grown in size, in just two days after the pollination. Notice the drying male flower still attached at the end of the female gourd. I've left it there when I pollinated the flowers, but the petals of the female flower has dried and fallen off.

If it is a successful pollination, the gourd would remain green and it will grow in size in a day or two. On the other hand, if the gourd starts to turn yellow, than the pollination is not successful or no pollination has occur. And I did have a few unsuccessful ones!


The first gourd, rather odd-shaped!


The second one, this looks much better! Length 15inches at time of harvest.


I harvested both the luffa gourds yesterday, the one on top, at 14 days from date of pollination. The odd-shaped one, 20 days from date of pollination, as I was unsure whether to harvest this earlier because of its shape and size, a good thing it was still tender.

When to harvest the gourds? This is the question that I have been asking myself. Should I harvest now or should I wait? This is not the first time I've grown these gourds. The first time was a few months ago. I was pretty excited when there are two lovely long gourds growing really well. My mistake was, I allow them to grow for about 3 weeks, thinking that they would be bigger and juicier! They did grow bigger, but not any juicier, only drier! And when I harvested the gourds, they have turned fibrous and hard. I did not expect the gourds to be old and hard after only three weeks! So now, I know that the best time to harvest the gourds would be at about 12-14 days from date of pollination. I would not go beyond 14 days! The best time would be about 12 days when they are young and tender, which is what you are looking for. 


Look at the tender luffa, simply lovely!  I'm pretty happy with this round of harvest, though it is only two gourds. From garden to table, what a good feeling!


***************************


Harvest of Bayam (Chinese Spinach,on the left), and Pak Choy (on the right), more than a week ago.


Happy Gardening !


Wednesday, June 10, 2015

Okra (Ladies Fingers) & Belimbing : From garden to table

Okra plant is very easy to grow. I have grown them a number of times before. The okra can be harvested in less than 3 months from date of sowing. I sowed six okra seeds on 13th March, and now I have six plants growing in my potted garden, all the seeds germinated and now are producing okras daily. I harvested the first okra about a week ago, and have been harvesting about 2 okra everyday. 


The flower is really lovely, hard to imagine that okras are from these flowers! 


 The growing okra, see the drying petal of the flower still on the tip.


Lovely healthy okra, homegrown with no pesticide whatsoever. The plants are really hardy and so far I have no problem of any bugs or plant pests.


Harvested 5 okras from this plant alone! Note : Okras are best harvested at 3-4 days. Yup, 3-4 days old. Once the flowers start to produce the okra, they grow really quick, in a matter of a few days! So it is advisable to harvest them when they are 3 to 4 days old. This is the time when they are at their best, tender and delicious. They turned hard and old really quickly, and this could happen overnight!


 More okras, this will be perfect to be harvested in two days time.


 My okra harvest.

I have been harvesting about 2 okras daily and I kept them in a zip lock bag, store them in the fridge for about a week, until I have enough to make a dish.


 Harvested some belimbings too! 


What's for dinner tonight?

Sambal Belimbing Chicken and Stir-Fry Okra with Dried Prawns. 

The okras are young and tender, and tasted delicious!


Happy Gardening !